
| 일 | 월 | 화 | 수 | 목 | 금 | 토 |
|---|---|---|---|---|---|---|
| 1 | 2 | 3 | 4 | 5 | 6 | 7 |
| 8 | 9 | 10 | 11 | 12 | 13 | 14 |
| 15 | 16 | 17 | 18 | 19 | 20 | 21 |
| 22 | 23 | 24 | 25 | 26 | 27 | 28 |
| 29 | 30 | 31 |
- putty
- adafruitio
- nodejs
- Private Key
- W5500
- Ethernet
- aws
- 라즈베리파이3
- micropython
- RP2040
- thonny
- circuitPython
- x.509
- W5100S
- vscode
- IoT Central
- w5500-evb-pico
- Python
- WIZnet
- Raspberry Pi
- ChatGPT
- Linux
- raspberrypi
- PuTTYgen
- SSH
- W5100S-EVB-Pico
- ubuntu
- openssl
- Azure
- PIR
- Today
- Total
Develop Note
How to connect to AWS IoT with W5100S-EVB-Pico Using Micropython 본문
How to connect to AWS IoT with W5100S-EVB-Pico Using Micropython
Chalsu 2022. 12. 6. 10:08Let's connect to AWS IoT Core using the W5100S-EVB-Pico board.
I will implement it using Micropython and connect it with the MQTT protocol.
Proceed to the following process.
- AWS services
- AWS IoT Core and device creation
- Download device certificate
- Upload Micropython firmware
- Write the main code
- Certificate conversion
- Check operation
Prerequisite
For reference, the host PC environment uses Windows 10 64bit, and the WSL2 environment is used together. (using OpenSSL)
H/W
- W5100S-EVB-Pico
- Micro 5-pin USB Cable
- LAN cable
S/W or Platform
- Thonny
- Micropython development
- AWS IoT
AWS Services
How to create a device in AWS service linked external content.
This content summarizes the process of linking WizFi360-EVB-Pico to AWS IoT Core based on C. The process of creating a device in AWS IoT is well explained.
A full description of the features can be found in the official guide document.
If you have completed creating the device, you should be able to get a device certificate and a root certificate.
It is also highlighted in the guide, but you must save the certificate on the device download certificate page that appears when you create it. Otherwise, you have to go through the creation process again.
Only the device certificate and private key are used here.
Upload Micropython Firmware
The process of building and uploading the firmware links content dealing with the existing Azure integration process instead.
Write application code
Here, we need to modify the following variables:
- Device Id
- MQTT Topic
- Assigned Topic or Free Topic
- Hostname (Endpoint)
- Set device certificates
- Device certificate
- Device private key
The full example code can be found at the link below.
Modify variables
Enter the variable values below according to the device resource information created by AWS.
The topic can be used as a free topic or a predefined topic can be used. Since the specified topic is used here, it is not specified separately.
device_id = '<Device Id>'
hostname = '<Hostname or Endpoint>'
mqtt_topic = f'$aws/things/{device_id}/shadow/update'- Device Id: Created Thing Name
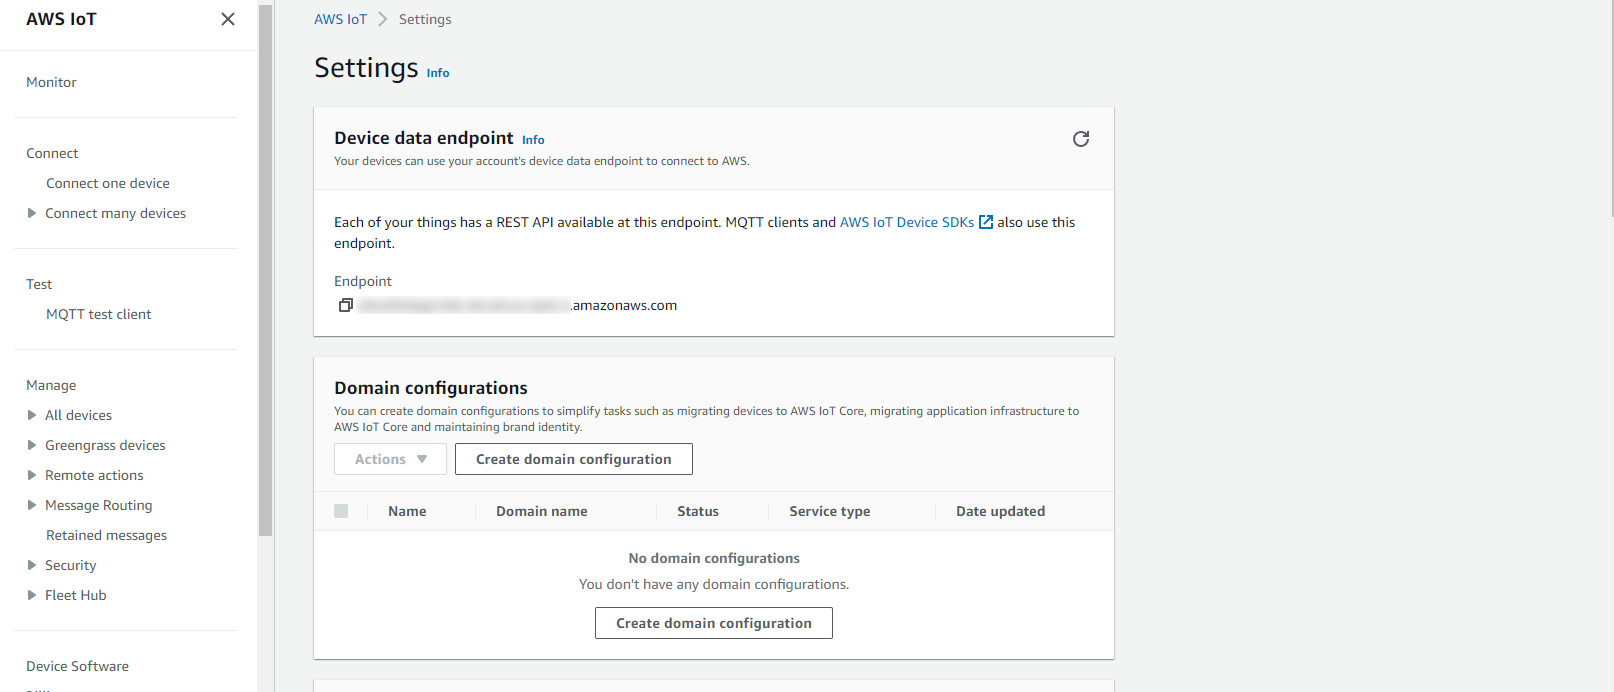
- Hostname (Endpoint): Can be found
AWS IoT - Settings
Config device certificate
Upload the downloaded certificate from the AWS resource configuration section to W5100S-EVB-Pico and set the path.
The downloaded certificate will be in the following format.
- <Certificate Id>-certificate.pem.crt
- <Certificate Id>-private.pem.key
- <Certificate Id>-public.pem.key
- AmazonRootCA1.pem
- AmazonRootCA3.pem
Among them, certificate.pem.crt and private.pem.key are used.
Convert certificates
You need to convert the certificate to a form that the Micropython library can recognize.
The downloaded certificate is in base64-based PEM format, and it will be converted to binary .der.
OpenSSL is used for certificate conversion, and it is recommended to use WSL (Windows Subsystem Linux) environment for Windows 10 or higher environment.
Convert the device certificate and private key to der format using the command below.
# Convert Device Certificate
openssl x509 -outform der -in certificate.pem.crt -out certificate.crt.der
# Convert Key
openssl rsa -inform pem -in private.pem.key -outform DER -out private.key.der
Upload certificates
Upload the converted certificate to Pico and set the path.
If you cloned the example, there will be a directory called cert, copy the device certificate and key file converted to .der here and upload the folder to Pico.
The left explorer window can be used with the View - Files option.


Place the cursor on the cert directory, right-click, and select the Upload to / menu to upload the folder as it is.
If the path or file name is different, you can modify the certificate path in main.py.
# Certificate path
cert_file = 'cert/certificate.crt.der'
key_file = 'cert/privateKey.key.der'
Install MQTT library for Micropython
Install the library in the Thonny environment.
After selecting Tools - Manage packages from the top menu, enter umqtt and search.
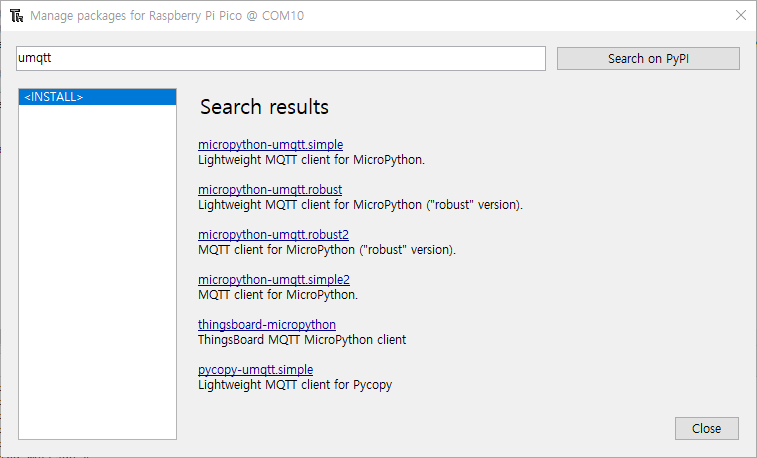
Select and install umqtt.simple among the found packages.

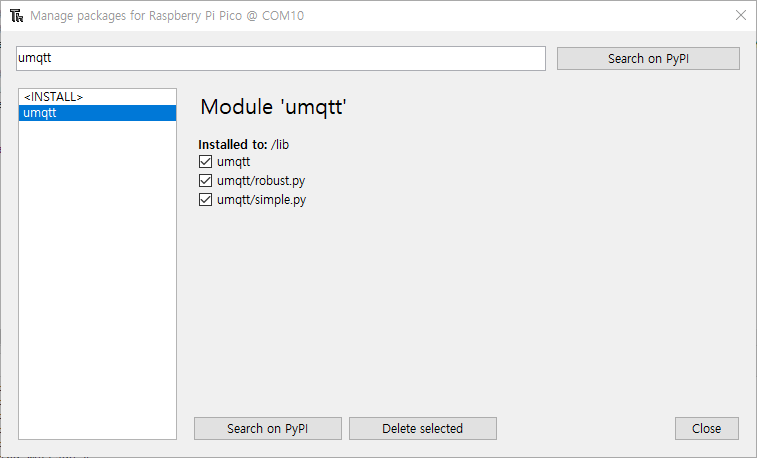
If the installation is successful, you can see the installed packages when you click umqtt in the list on the left.
Monitoring
Application
With main.py open in Thonny, click the play button at the top or click F5 key to run the application.
The debug message is output as follows.

If a connection error occurs, it is most likely a certificate problem. Check that the path is set correctly and that the certificate converted to .der is inserted.
Monitor AWS IoT
You can monitor device data by using the MQTT test client in the AWS IoT service.

If you press the Subscribe button after entering the topic set in the Subscribe to a topic tab, you can start subscribing to MQTT messages and monitor messages sent from the device.

So far, I have summarized how to connect to AWS IoT Core using Micropython using the W5100S-EVB-Pico device.